Step 5 - Deploy and run the Web Processing Service locally
Now that the data transformation application is ready, let’s deploy it locally and expose the service as a Web Processing Service.
- Using the Jupyter Lab Launcher, open a Terminal and type:
APP_NAME=<app-name>
cd /workspace/${APP_NAME}
- Type the command:
mvn clean install
The command above deploys the data transformation application files under the /application folder. A listener process will read the application.xml content, build and expose the OGC WPS interface.
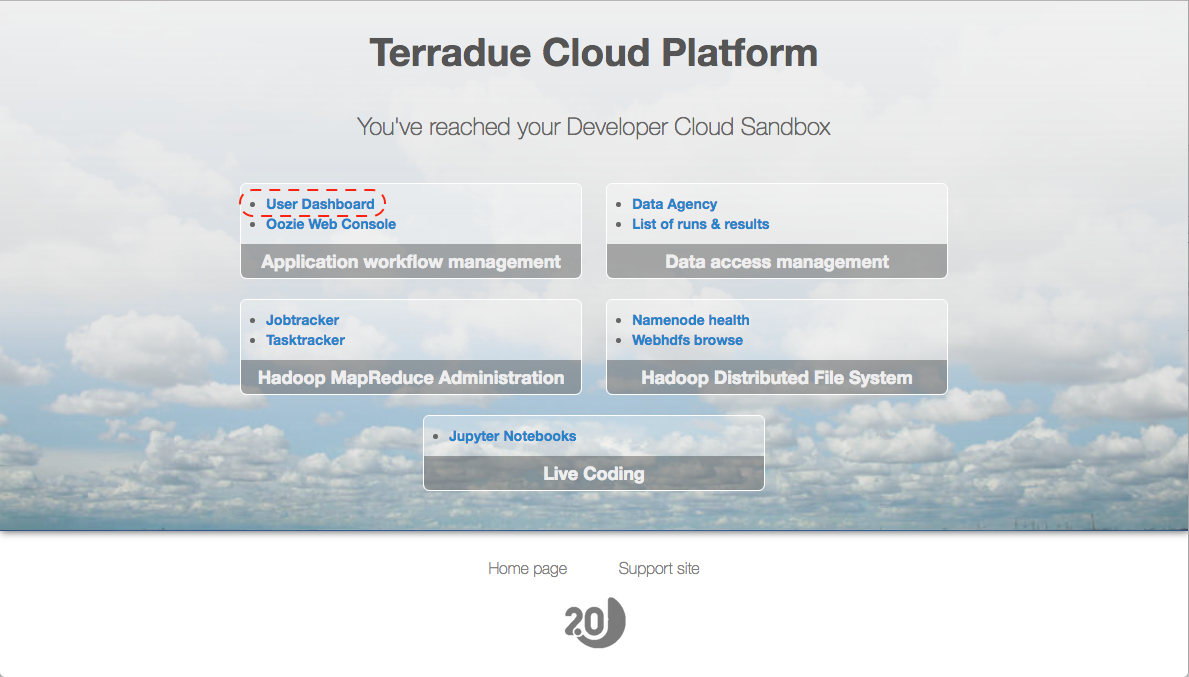
- Open a browser, and type the
<ellip_workflow_host>value of your Ellip Workflows VM, - See the Welcome page and click on the User Dashboard link:
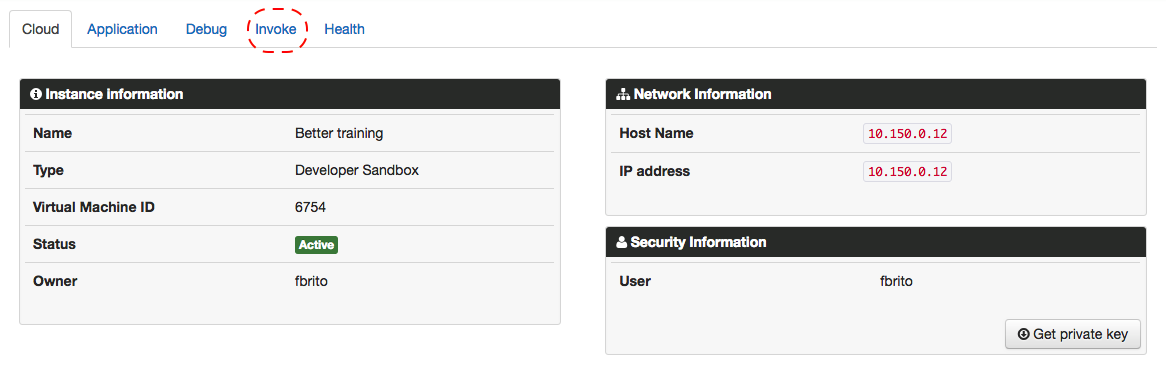
- Click on the Invoke tab:
- See the data transformation application’s name in the Process List and click on it:
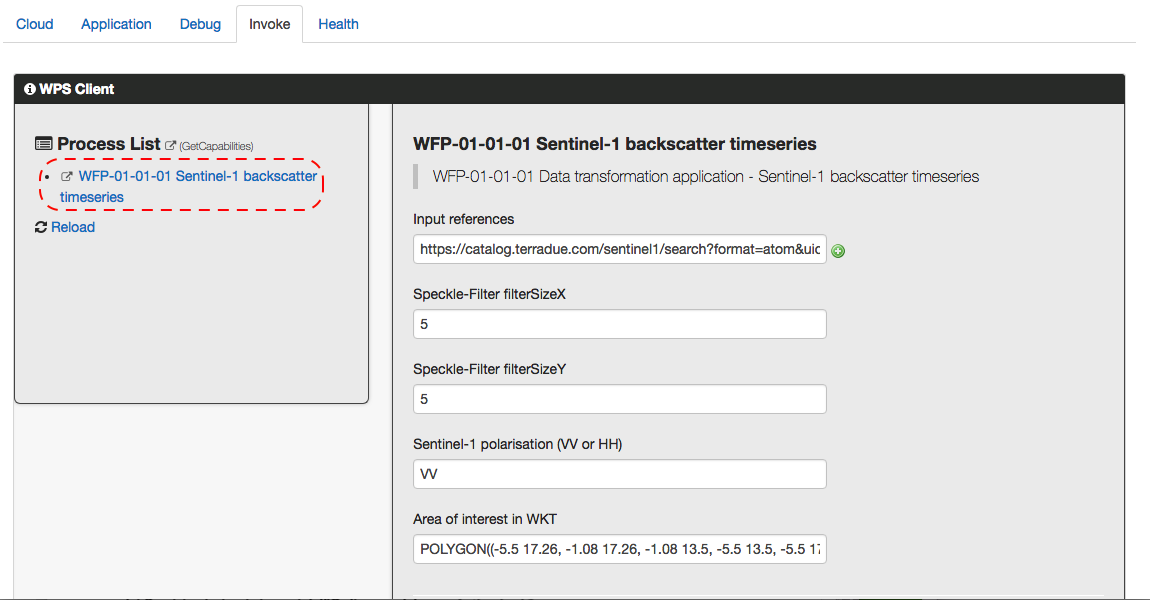
- Scroll down and click on Run Process to launch the data transformation application. It will:
- Download the Sentinel-1 product,
- Instantiate the input.ipynb notebook (saved as result.ipynb),
- Execute it,
- Publish the results generated.
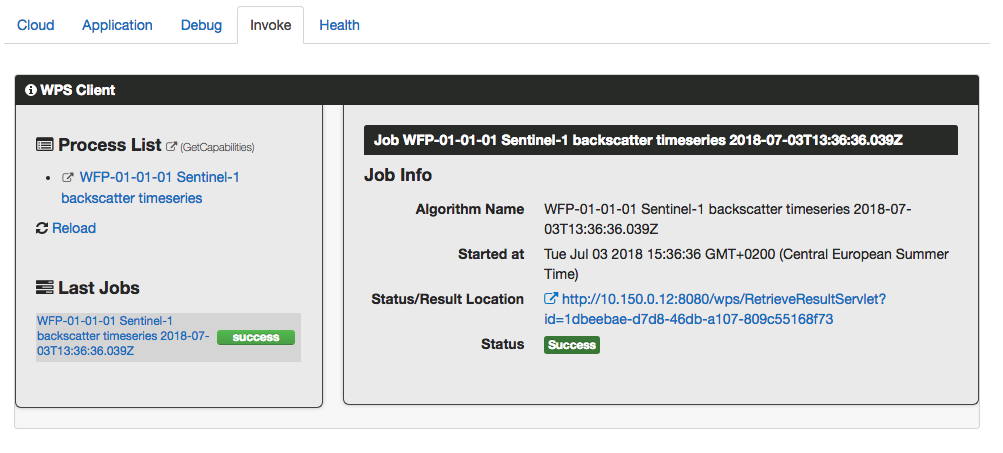
- Wait for the conclusion of the process:
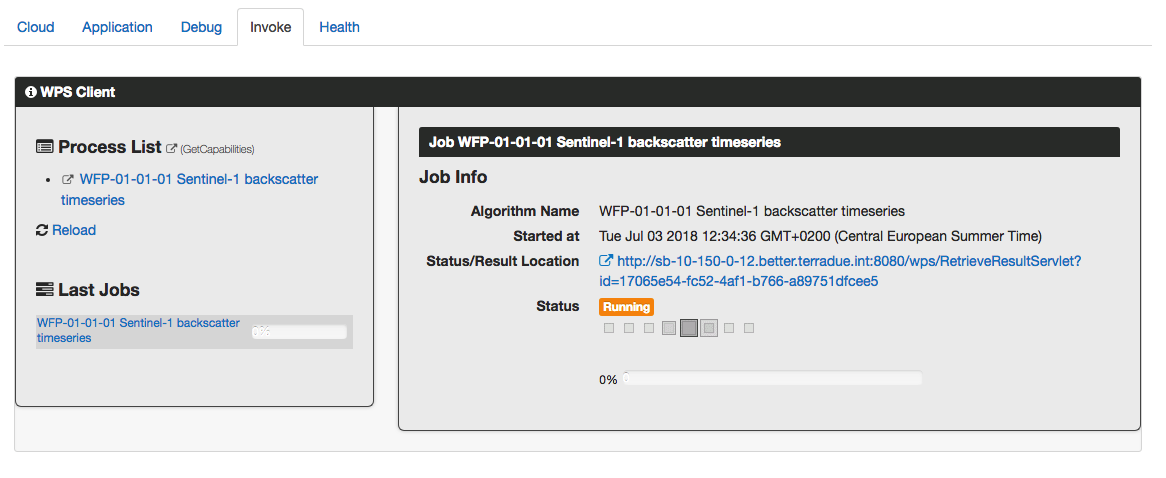
- When completed, see a page similar to:
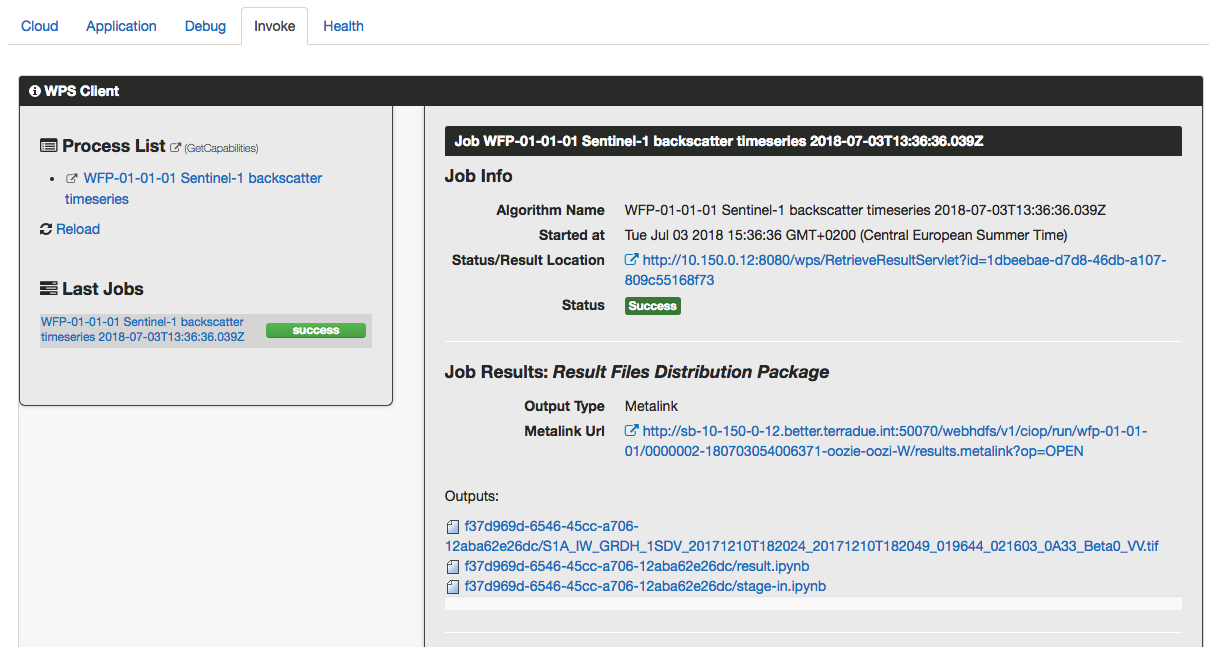
- Click on the link under the Last Jobs section and see the results produced:
Next step
The next step, Step 6 - Release the data transformation application, will use the ciop-release utility to create a release of the data transformation application.