Step 3 - Stage-in the EO data
The Jupyter Notebooks process local Earth Observation data. As such we have prepared a set of Jupyter notebooks that stage-in the EO data required for the implementation of each BETTER data pipelines data transformation application.
The stage-in notebooks are published on a software repository hosted by GitLab at the URL https://gitlab.com/ec-better/stage-in/better-stage-in-notebooks.
Stage-in Jupyter Notebooks file name include the data pipeline identifier to ease their identification and scope.
At this stage, the stage-in Jupyter Notebooks are:
- WFP-01-01-01 Sentinel-1 backscatter timeseries - stage-in
- WFP-01-01-02 Sentinel-1 coherence timeseries - stage-in
- WFP-01-02-02 Landsat-8 reflectances and vegetation indices - stage-in
- WFP-01-02-03 Sentinel-1 Sigma-0 backscatter all polarization - stage-in
- SATCEN-01-02-02 Sentinel-1 Multi-temporal Coherence Stack - stage-in
- ETHZ-01-03-01 Co-seismic deformation maps - stage-in
This step will clone the Stage-in Jupyter Notebooks git repository on the local sandbox and thus provide a simple way to stage-in EO data.
- On the Jupyter Lab Launcher, start a new Terminal:
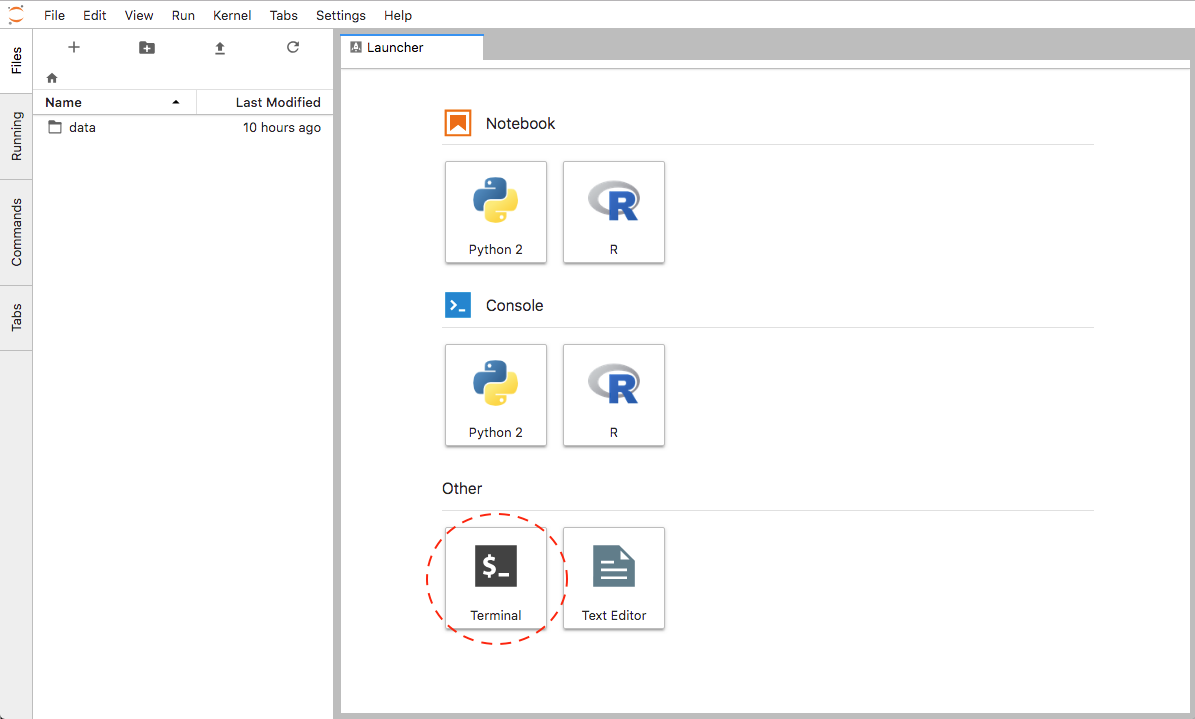
Jupyter new Terminal
- Type the commands below to set the
HOMEto/workspaceand clone the BETTER stage-in notebooks:
export HOME=/workspace
cd
git clone https://gitlab.com/ec-better/stage-in/better-stage-in-notebooks.git
This will create a new folder under /workspace:
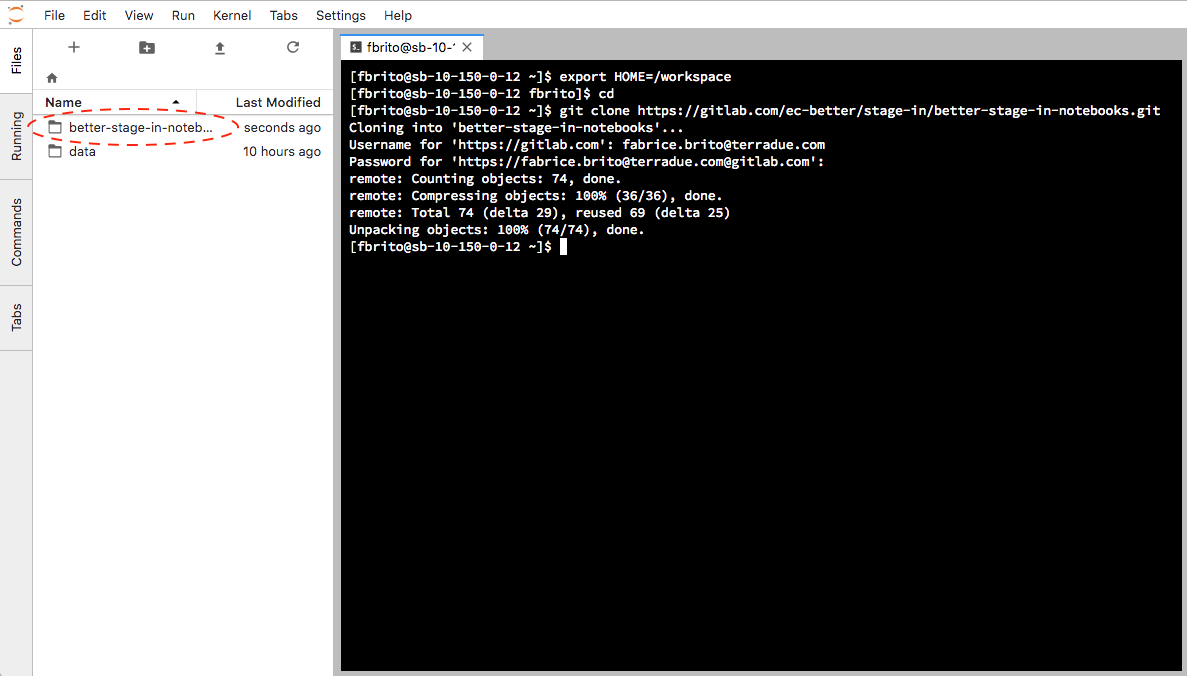
BETTER stage-in notebooks cloned
- On the left panel, browse the better-stage-in-notebooks folder and open the stage-in Jupyter Notebook WFP-01-01-01 Sentinel-1 backscatter timeseries - stage-in

WFP-01-01-01 Sentinel-1 backscatter timeseries - stage-in notebook
- Click Kernel/Restart Kernel and Run All Cells and wait for the conclusion of the EO stage-in:
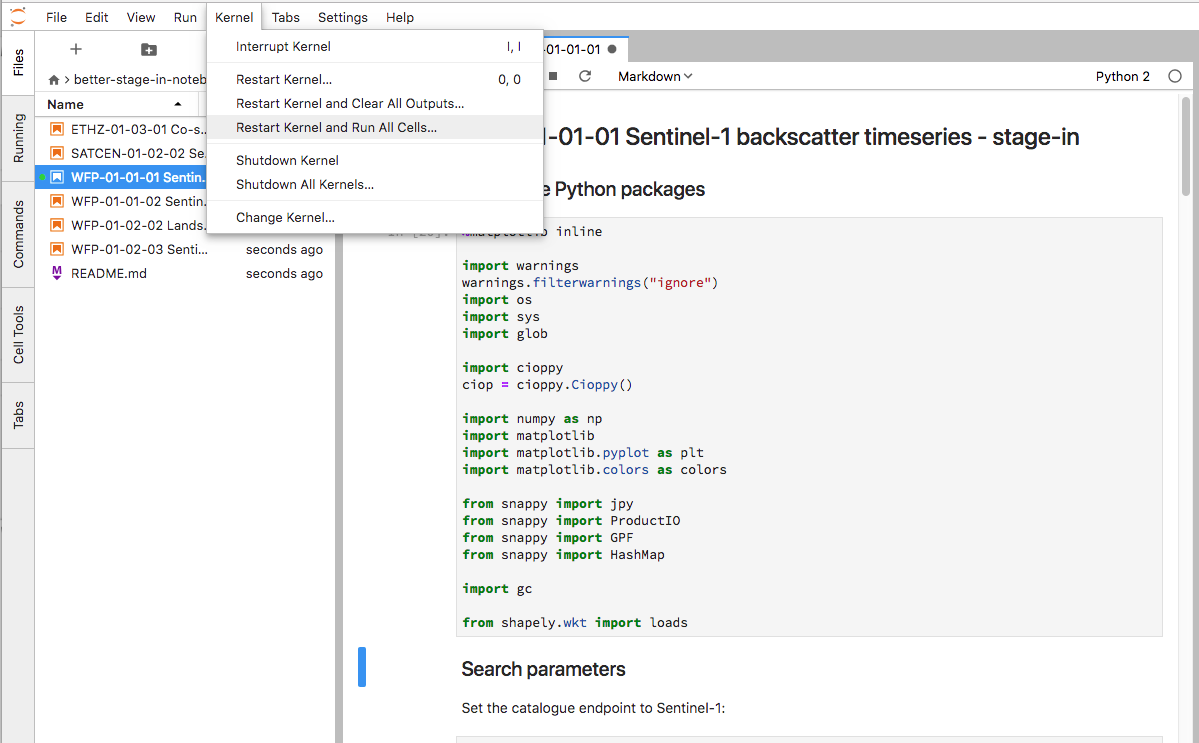
Kernel/Restart Kernel and Run All Cells
- Once completed, use the left panel to inspect the content of the ‘data’ folder. There is now a Sentinel-1 product that will be used for implementing the WFP-01-01-01 Sentinel-1 backscatter timeseries data transformation application:

Sentinel-1 product staged-in
The Stage-in Jupyter Notebook executed earlier creates two output cells that are worth drawing your attention to:
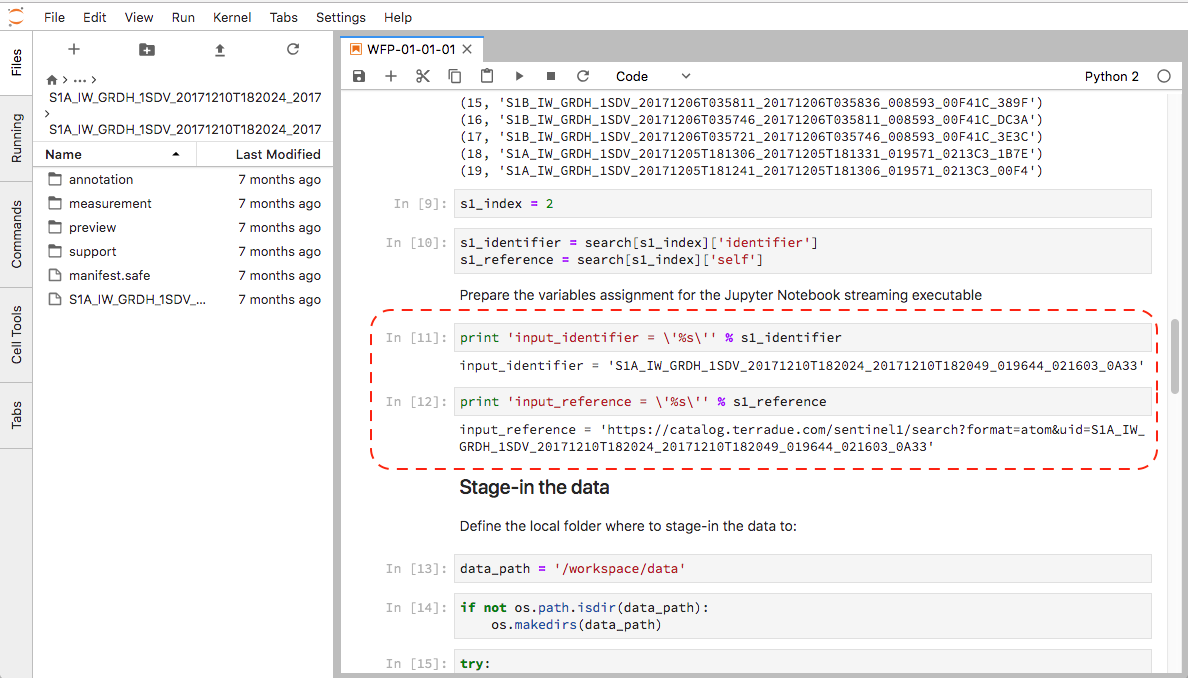
Ellip Workflows reserved keywords
The first is:
In [5]:
print 'input_identifier = \'%s\'' % s1_identifier
input_identifier = 'S1A_IW_GRDH_1SDV_20171210T182024_20171210T182049_019644_021603_0A33'
The output will be used in the Step 4 - Implement the data transformation steps of the tutorial when implementing the data transformation application using the staged-in Sentinel-1.
input_identifier is thus a reserved keyword in a Jupyter Notebook
streaming executable. This variable will be used to open the product
using SNAP.
The second is:
In [4]:
print 'input_reference = \'%s\'' % input_reference
input_reference = 'https://catalog.terradue.com/sentinel1/search?format=atom&uid=S1A_IW_GRDH_1SDV_20171210T182024_20171210T182049_019644_021603_0A33'
The output will also be used in the Step 4 - Implement the data transformation steps of the tutorial when implementing the data transformation application using the staged-in Sentinel-1.
input_reference is thus a reserved keyword in a Jupyter Notebook
streaming executable. It can be used for querying metadata about the
product to the Catalogue.
Now that there’s a Sentinel-1 product staged-in, proceed with Step 4 - Implement the data transformation steps